Foundation is the cornerstone of makeup, and for beginners, it can seem intimidating. The right foundation routine can transform your skin, creating a flawless, natural-looking base that lasts all day. From understanding your skin type to choosing the perfect products and mastering application techniques, this comprehensive guide covers everything a beginner needs to know about foundation. Whether you are getting ready for a day at work, a casual outing, or a special event, this routine ensures your skin looks smooth, radiant, and polished.
1. Preparing Your Skin
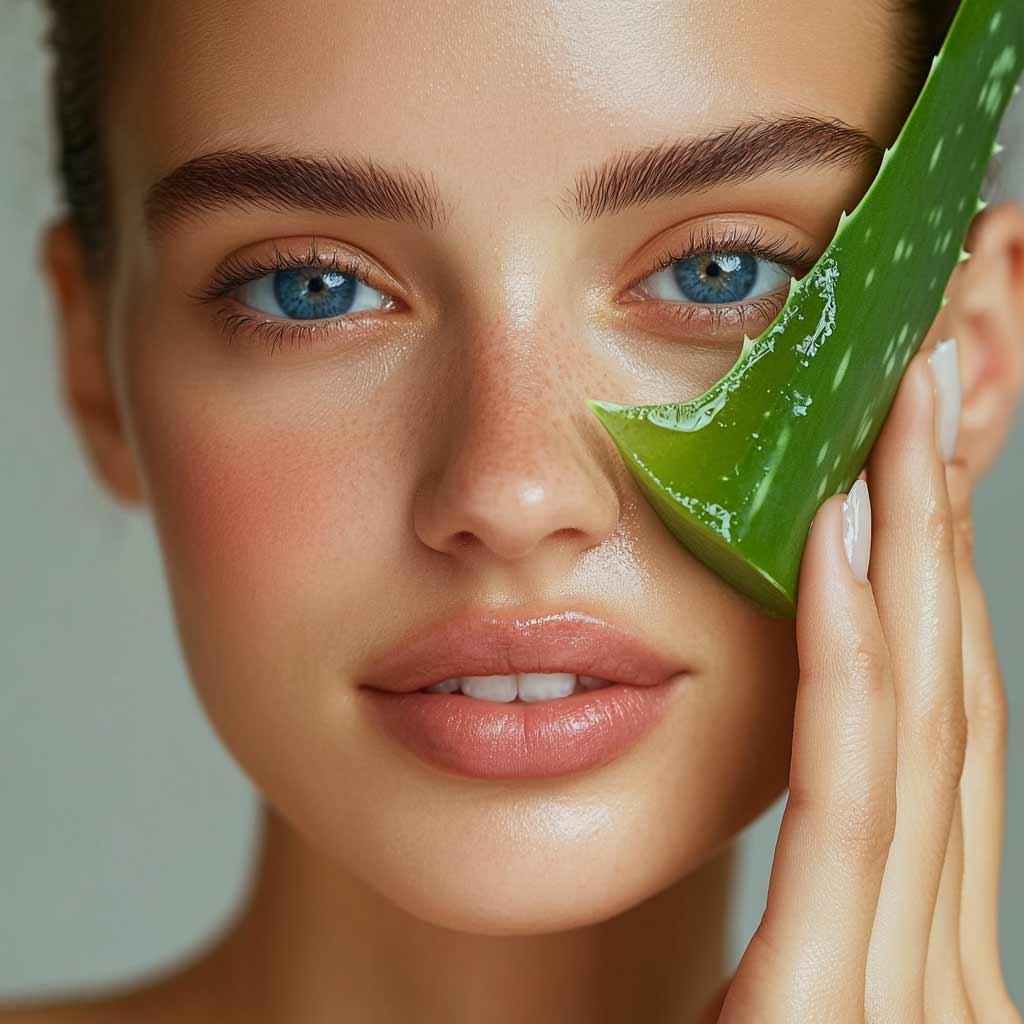
A flawless foundation starts with a healthy canvas. Proper skincare ensures your makeup applies evenly, looks natural, and lasts longer.
Steps for Skin Prep:
-
Cleanse: Remove dirt, oil, and impurities with a gentle cleanser suitable for your skin type.
-
Tone: Apply a toner to balance your skin’s pH and reduce the appearance of pores.
-
Moisturize: Hydrated skin is essential; even oily skin needs a lightweight moisturizer to prevent patchiness.
-
Sunscreen: Always use SPF to protect against harmful UV rays.
Optional: For specific skin concerns like pigmentation, acne, or dryness, incorporate serums or treatments before applying makeup. Healthy skin is the foundation of flawless makeup.
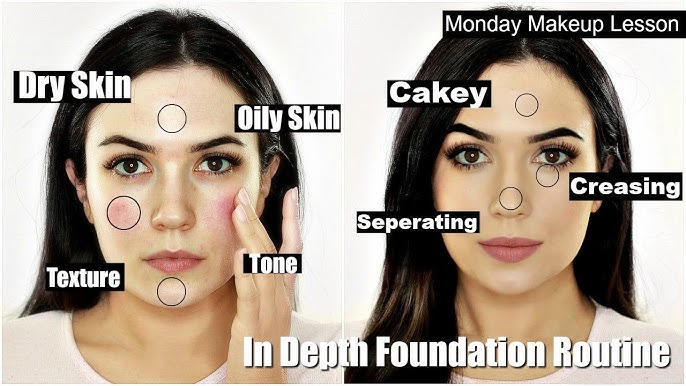
2. Understanding Your Skin Type
Before selecting a foundation, determine your skin type to choose products that suit you best:
-
Oily Skin: Choose mattifying or oil-free foundations to prevent shine.
-
Dry Skin: Opt for hydrating or dewy-finish foundations to avoid a cakey appearance.
-
Combination Skin: Use semi-matte foundations or mix formulas for different areas.
Knowing your skin type will prevent common mistakes and ensure a smoother finish.
3. Choosing the Right Foundation
Foundation selection is crucial for achieving a natural, flawless look. Consider the following:
Coverage Levels:
-
Sheer Coverage: Perfect for everyday natural makeup.
-
Medium Coverage: Covers imperfections while looking natural.
-
Full Coverage: Ideal for special events or to hide blemishes or uneven skin tone.
Shade Matching: Always test foundation on your jawline and neck rather than your hand to find the best match. The goal is a seamless transition between face and neck.
Finish Options:
-
Matte: Controls shine, ideal for oily skin.
-
Dewy: Adds radiance, perfect for dry or mature skin.
-
Natural/Satin: Combines softness and subtle glow, suitable for all skin types.
4. Primer: The Key to a Smooth Base
A primer smooths your skin, reduces the appearance of pores, and helps foundation adhere better.
Choosing a Primer:
-
Hydrating primers for dry skin.
-
Mattifying primers for oily skin.
-
Luminous primers for a subtle glow.
Application: Apply evenly using fingertips or a beauty sponge, focusing on areas where foundation tends to crease or fade. Primer creates the perfect canvas for a long-lasting base.
5. Tools for Application
The tools you use can dramatically affect the final result:
-
Beauty Sponge: Provides a soft, natural finish. Slightly dampen for best results.
-
Foundation Brush: Offers more precision and control, ideal for medium to full coverage.
-
Fingers: Allow natural warmth to blend lightweight foundations seamlessly.
Experiment with different tools to find the one that works best for your skin and foundation type.
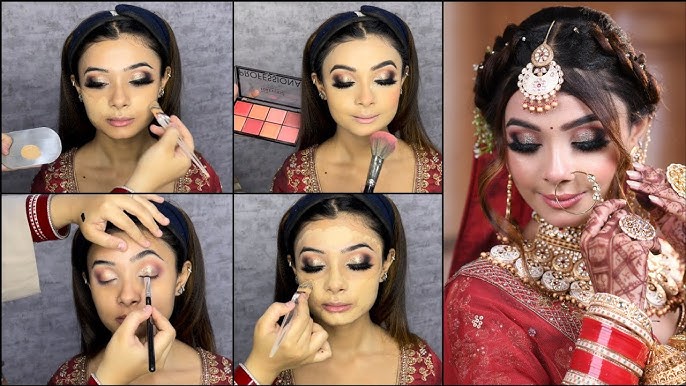
6. Applying Foundation: Step by Step
Follow these steps for a flawless finish:
-
Dot Foundation: Apply small dots on the forehead, cheeks, nose, and chin.
-
Blend Outward: Use your chosen tool to blend from the center outward.
-
Build Coverage: Add extra product only where needed to avoid a cakey appearance.
-
Check in Natural Light: Ensure your foundation matches your skin tone perfectly.
Pro Tip: Start with a light hand; it’s easier to build coverage than to remove excess product.
7. Concealer: Targeted Coverage
After foundation, conceal areas that need extra attention:
-
Under-eye circles
-
Blemishes or acne spots
-
Redness around the nose or chin
Use a creamy, lightweight concealer. Apply in small amounts and blend gently to maintain a natural finish. Avoid over-layering, which can lead to caking.
8. Setting Your Base
Setting foundation ensures it lasts longer and prevents shine:
-
Powder: Lightly dust translucent powder on areas prone to oiliness (like the T-zone).
-
Setting Spray: Finish with a setting spray to create a soft, skin-like finish and lock in makeup for all-day wear.
This step keeps your foundation looking fresh and prevents it from moving throughout the day.
9. Adding Dimension
Even a flawless foundation can look flat without subtle dimension. Beginners can enhance their base using minimal steps:
-
Blush: Apply cream or powder blush on the apples of your cheeks, blending upward for a natural flush.
-
Bronzer: Lightly contour using bronzer on areas that catch the sun, such as cheekbones, forehead, and jawline.
-
Highlighter: Apply subtle highlighter to high points of the face, like cheekbones and the bridge of the nose, for a soft glow.
These steps bring your face to life without overwhelming the base.
10. Common Beginner Mistakes
Avoid these errors for a flawless foundation:
-
Wrong Shade: Always match foundation to your jawline, not your hand.
-
Too Much Product: Apply gradually; less is more.
-
Skipping Skincare: Foundation sits better on hydrated, healthy skin.
-
Harsh Blending: Blend gently to achieve a smooth finish.
-
Neglecting Primer: Skipping primer can cause uneven texture and shorter wear time.
Learning from these mistakes will help beginners perfect their foundation routine quickly.
11. Long-Lasting Makeup Tips
To make your foundation last throughout the day:
-
Use primer before foundation.
-
Build coverage gradually rather than applying heavy layers.
-
Set with a light powder in oily areas.
-
Finish with a setting spray for a natural, long-lasting finish.
This routine ensures your makeup remains flawless without feeling heavy or uncomfortable.
12. Adjusting for Skin Types
Oily Skin: Oil-free foundation, mattifying primer, and translucent powder for shine control.
Dry Skin: Hydrating foundation, luminous primer, and cream-based products for smooth blending.
Combination Skin: Use different formulas for different areas (mattify T-zone, hydrate cheeks) for balanced results.
Adapting your routine to your skin type prevents common issues like dryness, oiliness, and patchiness.
13. Tips for Beginners
-
Blend thoroughly: Smooth transitions prevent a “mask-like” look.
-
Check in natural light: Artificial light may hide unevenness.
-
Keep tools clean: Dirty brushes and sponges can cause breakouts and uneven makeup.
-
Practice regularly: Foundation application improves with experience.
-
Layer gradually: Always start with less product; build only where necessary.
14. Optional: Glow Enhancement
For a radiant, healthy look, mix a drop of liquid highlighter with your foundation or apply a subtle highlighter on high points after blending. This gives a soft, natural glow that enhances your base without looking overdone.
15. Quick Fixes
-
Cakey Foundation: Blend with a damp sponge or add a few drops of moisturizer.
-
Too Dark: Apply lighter concealer or highlight to balance tone.
-
Shiny T-Zone: Dust translucent powder lightly.
-
Dry Patches: Avoid powder; hydrate and use cream products instead.
These tips help maintain a flawless base throughout the day.
Final Thoughts
A flawless foundation routine is the backbone of any makeup look. By following this in-depth guide, beginners can confidently prepare their skin, select the right foundation, apply it correctly, and create a smooth, radiant base. Proper skincare, the right tools, blending techniques, and setting methods all contribute to a natural, polished finish.
Foundation is not just a product; it’s a technique. When mastered, it enhances your natural beauty, evens out your complexion, and prepares your face for any additional makeup. With patience and practice, even beginners can achieve professional-level results. This full foundation routine ensures your skin looks flawless, radiant, and ready for any occasion.
Read Also: Keep your face towards the sunshine and shadows will fall behind you
Watch Also: https://www.youtube.com/@TravelsofTheWorld24


Leave a Reply