Earth science is the study of our planet, including its land, water, air, and natural processes. Learning about Earth can be exciting, especially when you get hands-on with projects that show how mountains form, volcanoes erupt, and the atmosphere works.
In this article, we will explore easy and engaging Earth science projects that students can do at home or in class. These projects are perfect for kids, teens, and budding scientists, and they help make learning interactive and memorable.
Why Earth Science Projects Are Important
Hands-on projects help students:
-
Visualize abstract concepts like tectonic movement and erosion
-
Understand natural processes in a fun way
-
Develop problem-solving and critical thinking skills
-
Prepare for school science fairs or presentations
Projects allow students to see science in action, turning textbooks into exciting experiments.
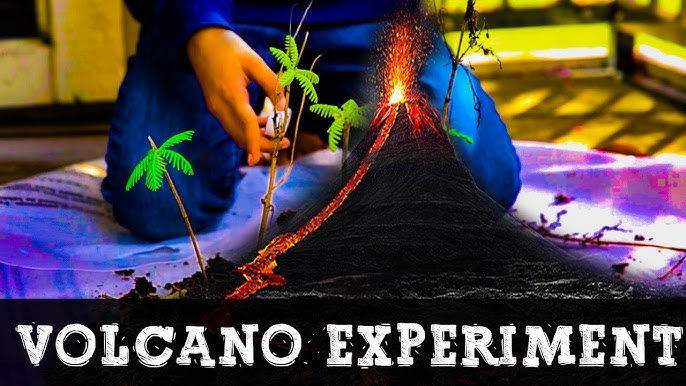
Project 1: DIY Volcano Eruption
Materials Needed:
-
Baking soda
-
Vinegar
-
Food coloring (optional)
-
Small plastic bottle
-
Tray
Steps:
-
Place the bottle on a tray.
-
Add 2–3 tablespoons of baking soda.
-
Add a few drops of food coloring.
-
Pour vinegar into the bottle and watch the eruption!
Learning Outcome:
-
Demonstrates how magma rises from the mantle through a volcano.
-
Shows chemical reactions in a safe, visual way.
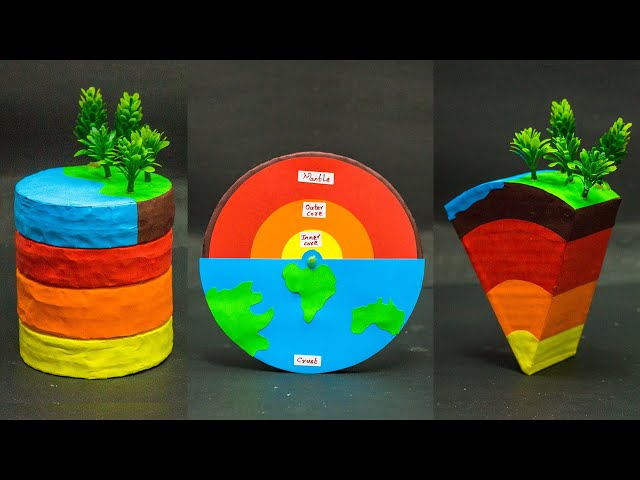
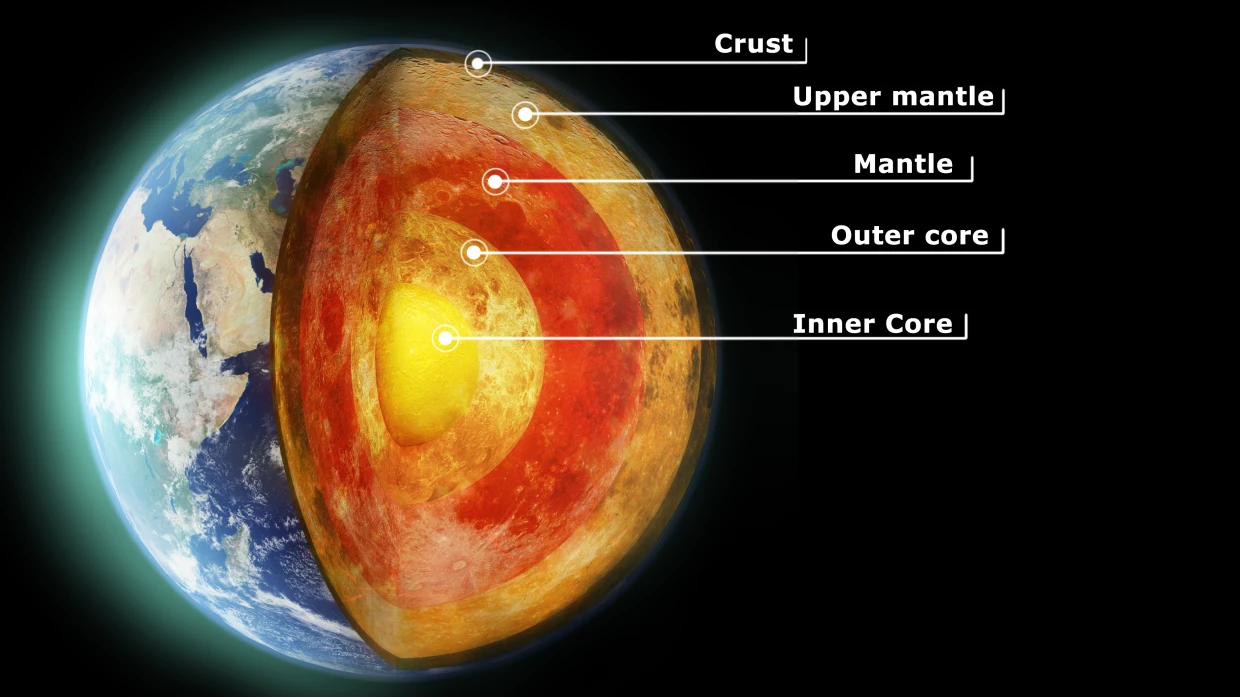
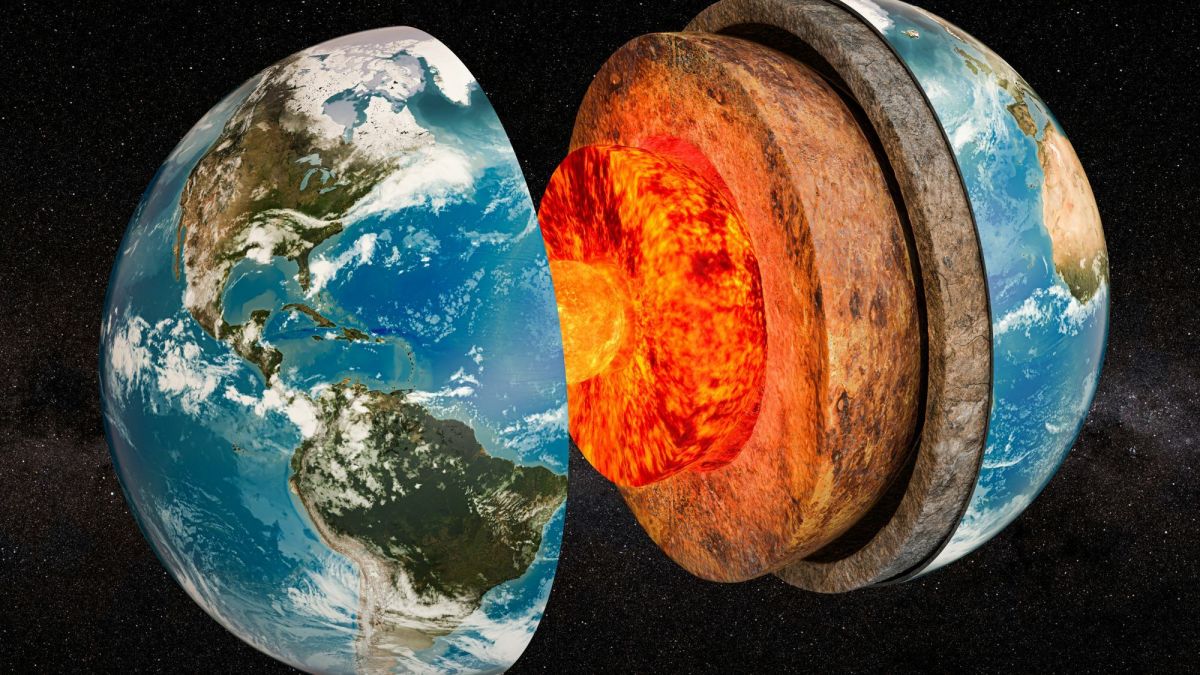
Project 2: Make a Model of Earth’s Layers
Materials Needed:
-
Modeling clay or Play-Doh
-
Different colors for crust, mantle, outer core, inner core
-
Knife for slicing
Steps:
-
Roll layers of clay to represent Earth’s layers:
-
Brown for crust
-
Orange for mantle
-
Yellow for outer core
-
Red or white for inner core
-
-
Stack them together to make a sphere or cylinder.
-
Slice to see the layers inside.
Learning Outcome:
-
Visualizes Earth’s structure.
-
Helps students understand thickness and composition of each layer.
Project 3: Erosion in Action
Materials Needed:
-
Tray or baking dish
-
Sand or soil
-
Small rocks
-
Water spray bottle
Steps:
-
Build a small hill of sand in a tray.
-
Add rocks to represent mountains.
-
Spray water to simulate rainfall and erosion.
-
Observe how soil and rocks move.
Learning Outcome:
-
Shows how wind and water shape landscapes.
-
Demonstrates the process of erosion and sediment deposition.
Project 4: Build a Rock Cycle Model
Materials Needed:
-
Crayons or clay
-
Labels for igneous, sedimentary, metamorphic
-
Small containers or paper
Steps:
-
Use clay or crayons to create examples of each rock type.
-
Label rocks as igneous, sedimentary, and metamorphic.
-
Explain the transitions between types, such as melting and cooling, compaction, and heat/pressure.
Learning Outcome:
-
Helps students understand the rock cycle.
-
Shows how rocks change over time due to Earth’s processes.
Project 5: Water Cycle in a Bag
Materials Needed:
-
Ziplock bag
-
Water
-
Blue food coloring (optional)
-
Marker
Steps:
-
Fill the bag with a small amount of water.
-
Add blue food coloring for visibility.
-
Seal the bag and tape it to a sunny window.
-
Watch evaporation, condensation, and precipitation inside the bag.
Learning Outcome:
-
Demonstrates the water cycle in a small, visible way.
-
Helps students understand rain formation and cloud development.
Project 6: Make a Mini Tornado
Materials Needed:
-
Two clear plastic bottles
-
Water
-
Duct tape
Steps:
-
Fill one bottle with water.
-
Tape the second bottle on top upside down.
-
Shake or swirl water to create a mini tornado.
Learning Outcome:
-
Demonstrates vortex formation and atmospheric patterns.
-
Helps students visualize how tornadoes spin.
Project 7: Simulate Earthquakes
Materials Needed:
-
Wooden board
-
Rubber bands
-
Small building blocks or LEGO
Steps:
-
Stretch rubber bands across a wooden board to create a “shake table.”
-
Build small structures on the board.
-
Shake the table gently to simulate an earthquake.
-
Observe which structures fall or withstand the movement.
Learning Outcome:
-
Shows how tectonic movement affects buildings.
-
Helps students understand the importance of earthquake-resistant design.
Project 8: Rock and Mineral Identification
Materials Needed:
-
Collection of rocks and minerals
-
Magnifying glass
-
Hardness testing kit (optional)
-
Chart for labeling
Steps:
-
Examine each rock using a magnifying glass.
-
Identify color, texture, and hardness.
-
Label each rock as igneous, sedimentary, or metamorphic.
Learning Outcome:
-
Teaches rock identification skills.
-
Encourages observation and classification.
Project 9: Simulate Mantle Convection
Materials Needed:
-
Clear container
-
Water
-
Food coloring
-
Heat source (lamp or warm water)
Steps:
-
Fill container with water.
-
Add drops of food coloring.
-
Heat one side and observe colored water rising and sinking, simulating mantle convection currents.
Learning Outcome:
-
Explains how heat from Earth’s interior moves tectonic plates.
-
Shows the role of convection in volcanic and seismic activity.
Project 10: Make a Weather Station
Materials Needed:
-
Thermometer
-
Rain gauge (plastic bottle)
-
Anemometer (wind speed device)
-
Notebook for recording data
Steps:
-
Place instruments outdoors.
-
Record temperature, rainfall, and wind speed daily.
-
Track changes over time and create graphs.
Learning Outcome:
-
Introduces meteorology and climate science.
-
Teaches data collection and analysis.
Project 11: Acid Rain Experiment
Materials Needed:
-
Vinegar (simulates acid rain)
-
Limestone or chalk
-
Tray
Steps:
-
Place chalk or limestone on a tray.
-
Pour vinegar over it to simulate acid rain.
-
Observe bubbles and erosion over time.
Learning Outcome:
-
Demonstrates chemical weathering.
-
Shows how pollution affects rocks and buildings.
Project 12: Build a Glacier Model
Materials Needed:
-
Tray or baking pan
-
Water
-
Small rocks
-
Freezer
Steps:
-
Fill tray with water and small rocks.
-
Freeze to create ice.
-
Move ice across a sand or flour surface to simulate glacial movement and erosion.
Learning Outcome:
-
Demonstrates how glaciers shape landscapes.
-
Shows the power of slow-moving ice in creating valleys and fjords.
Project 13: Create a Fossil
Materials Needed:
-
Clay or play dough
-
Small plastic animals or leaves
-
Plaster of Paris
Steps:
-
Press the object into clay to make an imprint.
-
Pour plaster over the imprint and let it set.
-
Remove clay to reveal a fossil replica.
Learning Outcome:
-
Teaches how fossils form naturally.
-
Explains Earth’s history and paleontology.
Project 14: Water Filtration Experiment
Materials Needed:
-
Plastic bottle
-
Sand, gravel, and charcoal
-
Dirty water
Steps:
-
Cut the bottle in half.
-
Layer sand, gravel, and charcoal inside.
-
Pour dirty water through the layers.
-
Observe filtered water at the bottom.
Learning Outcome:
-
Demonstrates natural filtration in soil and rock layers.
-
Teaches importance of clean water and environmental science.
Project 15: Earthquake Proof Structures
Materials Needed:
-
Marshmallows
-
Toothpicks
-
Shake table (optional)
Steps:
-
Build small towers using marshmallows and toothpicks.
-
Test them on a shake table or by gently shaking the surface.
-
Observe which designs are strongest.
Learning Outcome:
-
Teaches engineering concepts.
-
Shows how Earth science informs building safety.
Tips for Successful Earth Science Projects
-
Label everything clearly for presentations.
-
Use different colors to make layers or processes visible.
-
Document observations with drawings, photos, or videos.
-
Follow safety rules for chemical or heat experiments.
-
Discuss the scientific concepts behind each project.
Why Earth Science Projects Matter
Earth science projects are not just fun—they are educational and practical:
-
Help students understand natural disasters like earthquakes and volcanoes
-
Teach environmental awareness
-
Encourage critical thinking and creativity
-
Prepare students for future science studies
-
Make learning hands-on and interactive
These projects combine fun and learning, helping students explore Earth in a memorable way.
Fun Facts About Earth
-
Earth is around 4.5 billion years old.
-
About 70% of Earth’s surface is covered by water.
-
Earth’s magnetic field is created by the liquid outer core.
-
Tectonic plates move about as fast as fingernails grow.
-
Volcanoes, earthquakes, and mountains are all caused by Earth’s dynamic interior.
Conclusion
Earth science is an amazing subject that explores how our planet works. Science projects make learning interactive, fun, and memorable. From building volcanoes and layered models to simulating earthquakes and weather cycles, these projects help students visualize and understand Earth’s processes.
Whether you are a teacher, student, or parent, Earth science projects provide hands-on experiences that turn complex concepts into something tangible and exciting. By exploring Earth’s layers, water cycle, weather, rocks, and tectonic activity, students gain a deeper appreciation for the planet we call home.
Read Also: Keep your face towards the sunshine and shadows will fall behind you
Watch Also: https://www.youtube.com/@TravelsofTheWorld24


Leave a Reply